How It Was Made: James Dexter – Reese’s Groove (Inermu – Deep Tech)
James Dexter reached a major milestone with the release of Here Now, his first full-length album on Inermu. The project lands at the ten-year mark of the label and reflects a long period of consistent work within the UK underground. Across the LP, he moves through the fuller range of his approach to house music, moving from stripped rhythmic patterns to rolling low-end movement and lighter melodic touches.
James Dexter: Instagram / Soundcloud / Spotify
The album carries the qualities people associate with his catalog: clean drums, tight bass programming, and arrangements that flow with clarity inside a club setting. Early singles such as Feels and Reese’s Groove set a clear tone for the full body of work. The LP connects his influences, his production choices, and the way he approaches groove-based tracks after years of releasing on trusted labels.
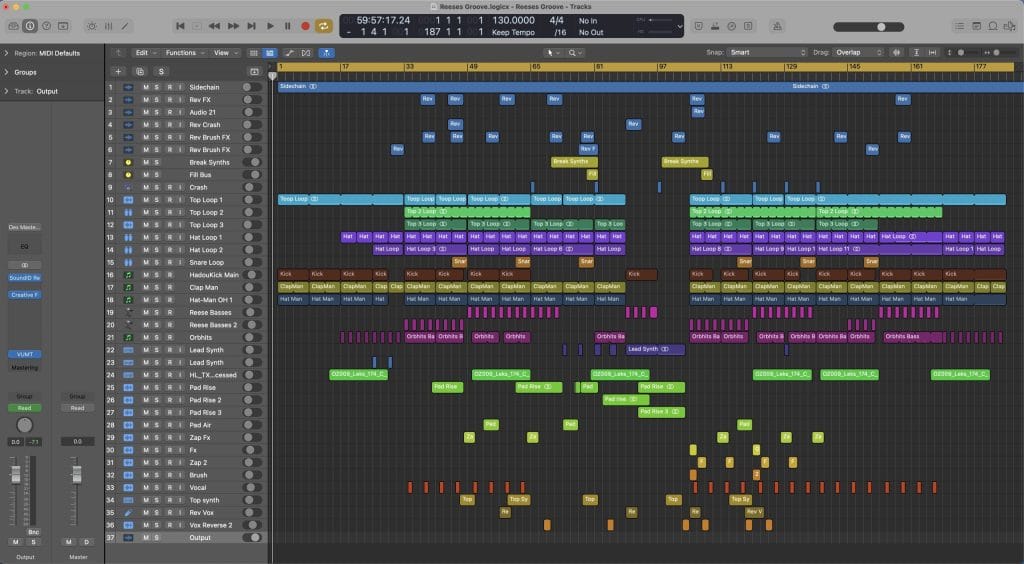
This feature takes a closer look at the tools behind Reese’s Groove, focusing on the StemCellz plugins he built earlier this year. Each section highlights the exact methods he used in the session, offering producers a detailed look at how those tools shaped the final mix.
Reese Basses
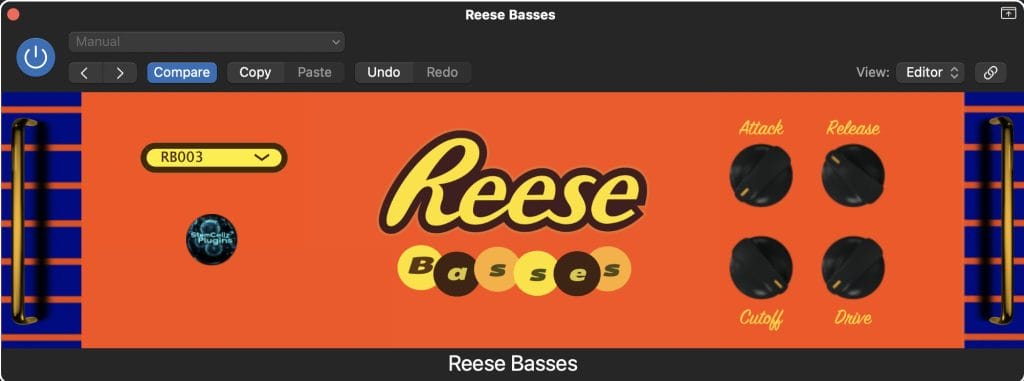
The first plugin I want to highlight is Reese Basses by StemCellz, a dedicated VST for all types of Reese-style bass sounds. It’s a sample-based plugin containing 40 original presets, all created by me to ensure a high-quality, authentic sound source.
This plugin plays a central role in the track’s overall movement and groove. The bassline evolves throughout the arrangement, not only shifting patterns but also swapping sound presets to match the energy of each section. To achieve this, I alternated between two key presets—Preset 3 and Preset 40—which each bring their own unique character to the low end.
Preset 3 has a slightly higher tone and a more pronounced wobble, adding energy and movement to the low end. It pairs so well with the Orbhits bassline pattern, creating a dynamic interplay between the two.
Preset 40, on the other hand, sits lower in tone with a slower LFO movement. It fits perfectly in the sections where the bass notes are longer and more sustained, delivering a solid, weighty low end.
The original concept behind my plugins was to make professional-quality sounds easily accessible to beginners and beyond. Simple, plug-and-play tools that eliminate the need to dig through countless samples. While the plugins are sample-based, every sound is organically created by me, ensuring authenticity and character.
These plugins have been the backbone of my drums and bass across most of the album, really helping to shape the overall vibe and bring a consistent feel from track to track.
Each plugin is designed with simplicity in mind: just the essential controls—Attack, Release, Filter Cutoff, and Drive—so users can quickly shape the sound without getting lost in complex parameters. The goal is to make it effortless for anyone producing house, garage & drum & bass and even hip hop.
SPL -Transient Designer
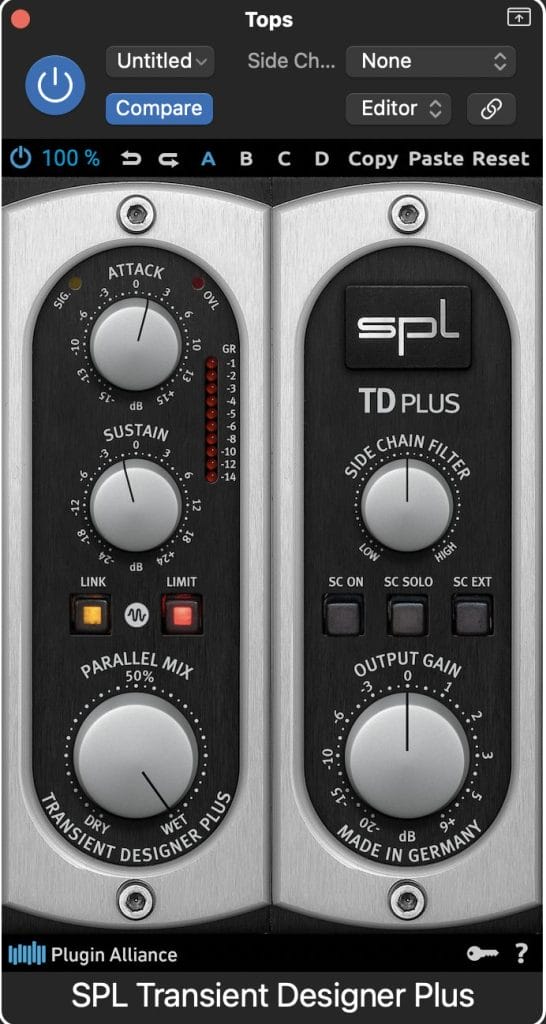
The SPL Transient Designer is a dynamics processor that gives you direct control over the attack and sustain of your sounds—without using traditional compression. Instead of working with thresholds or ratios, it lets you shape transients in a simple way, its ideal for tightening drums or adding punch. By boosting attack, you can make hits more impactful, and by reducing sustain, you can clean up room noise (such as unwanted reverb) or overlapping frequencies. It’s a great plugin for sculpting the groove and clarity of percussion-heavy tracks.
For Reeses Groove, I used the Transient Designer on a drum bus, which contained around five sample drum top loops along with the Clap from ClapMan plugin & Open Hat from HatMan plugin. I lightly increased the attack around 1.5db to bring out sharper transients and give each element more definition without raising the volume. Then I reduced the sustain by around 1.5 dB to tighten the tails and eliminate the wash from overlapping frequencies. This simple adjustment helped the entire top section lock into the groove and feel more controlled while still retaining energy.
Producers working on house and garage will find this plugin incredibly useful for creating clean, punchy drum grooves without over-processing. A small boost in attack can instantly add presence to hats and claps, while dialling back sustain helps loops sit tighter in the mix, especially when layering multiple top loop elements. I’ve found that subtle settings go a long way—it’s more about enhancing the rhythm than drastically reshaping it. If your drums feel cluttered, this is an easy way to bring clarity and groove back into the mix.
Soothe2 By Oeksound
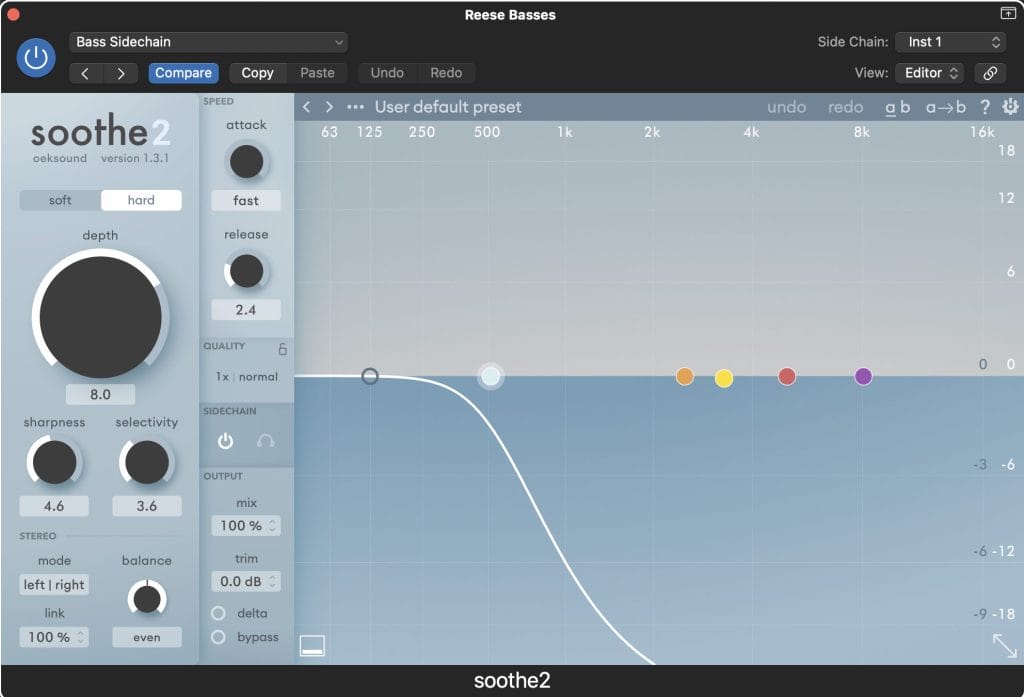
Soothe2 is an intelligent dynamic resonance suppressor that actively identifies and reduces harsh frequencies in real time, without affecting the surrounding tonal balance. Rather than using static EQ cuts, it adapts to the incoming signal and only applies reduction where it’s actually needed, making it incredibly transparent. This allows you to control harshness and muddiness while keeping the original character of the sound.
On Reese Groove, I used Soothe2 across a few key channels with a particular focus on its sidechain feature. In the low end, I sidechained the bass to the kick’s frequency range so Soothe2 could gently reduce only the overlapping frequencies, rather than ducking the entire signal. This kept the groove tight and punchy while still allowing the bass to maintain its full energy and presence. I also applied Soothe2 to multiple hi-hat layers to remove overlapping resonances, this helped each layer cut through clearly without clashing in the upper frequency range. This use of Soothe2 allows me to keep everything sonically clean and defined.
For anyone producing all styles of House or Garage, partially using multiple top loop samples, Soothe2 can be a game-changing tool for achieving clarity without sacrificing warmth or impact. One tip I’ve learned is to use gentle settings — even a subtle amount of dynamic reduction can open up space in the mix and improve groove cohesion. If your tracks are feeling crowded or harsh in the mids and highs give soothe a try, especially when paired with the SPL Transient Designer, this pair of plugins is a game changer for tighter drums.
SoundID Reference by Sonarworks
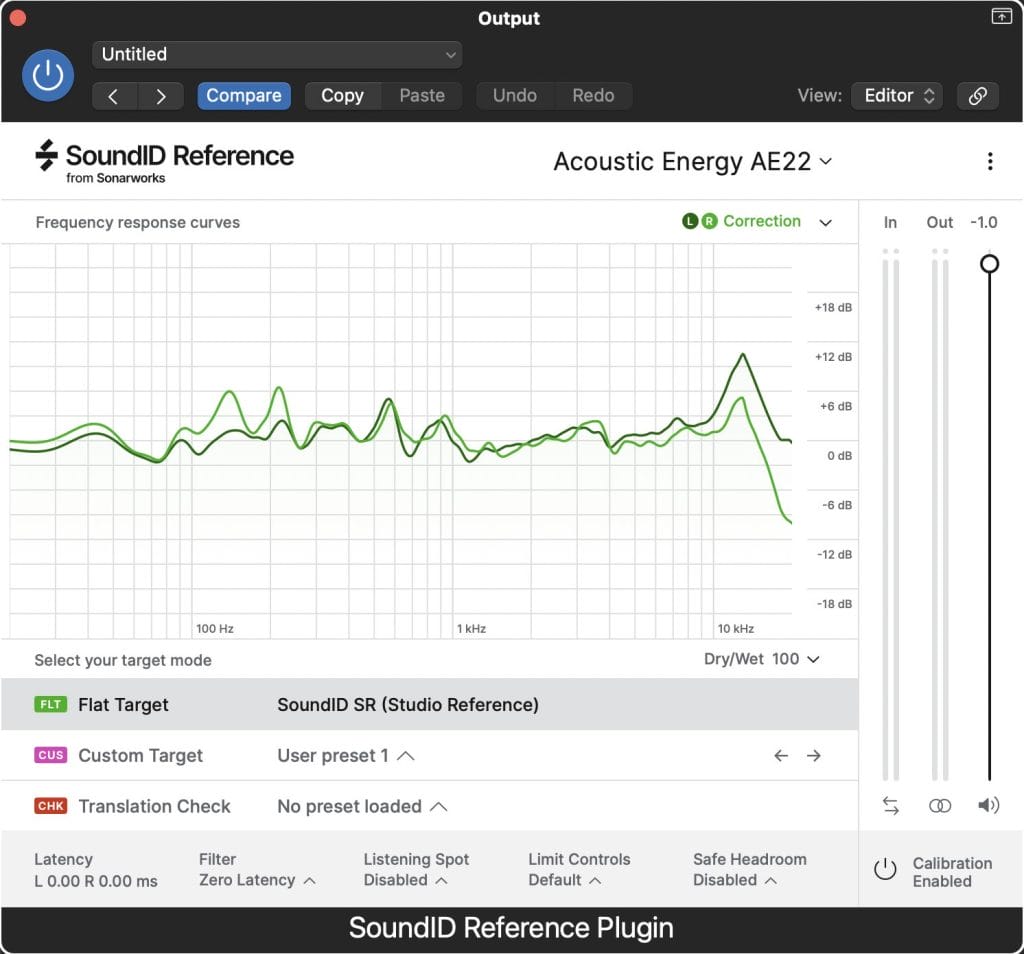
Last but by no means least id love to talk about SoundID Reference by SonarWorks.
SoundID is a calibration tool thats runs on the master output of your DAW and corrects and flattens your monitoring environment so you hear your mix more honestly. It measures your speakers (or uses headphone profiles) and builds a corrective EQ curve to compensate for room and equipment irregularities.
I use SoundID Reference on the master monitoring chain on every track I produce, and also at Mix and Mastering stages. A nice trick is using the blend between “mixed” and “linear phase” modes, keep linear phase on for final mix checking, but mixed or zero latency when tracking or doing creative adjustment
This is a plugin I would highly recommend for any producer regardless of genre, it gives you a more honest monitoring reference, making it easier to make decisions about bass, highs, and balance — and reduces the “surprise on other systems” factor when testing out your music.
James Dexter’s Tips For Making Music

Tip #1
Collaboration accelerates growth like nothing else. Working with other producers who share your sound & style will expose you to new techniques, fresh energy and potentionally bring ideas forward you may not have thought about on your own.
Tip #2
Always follow the feeling. Make the music you genuinely love & see the idea through to the finish — momentum comes from completing tracks, not just starting them.
Tip #3
Ear not the gear, sound selection is the real key to creating a certain type of genre, less is often more, make sure the sounds you have are delivering the impact you want before reaching for more sounds. Overloading sounds to make something sound “Full” can do more harm than good. If the sound selection is right, the mix will sound tight.