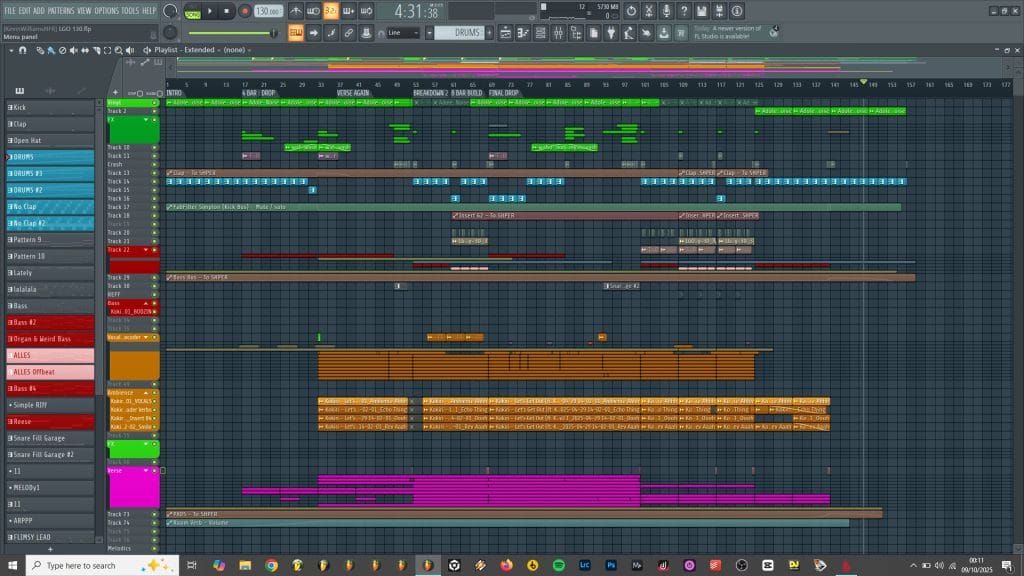
How It Was Made: Kokiri ft. Kelli-Leigh – Let’s Get Out (Kokidex)
Liverpool’s Kokiri has a way of making house music that feels effortless but built on years of refinement. Since breaking through with Turn Back Time (Retrospect), he’s kept a steady presence across BBC Radio 1, Kiss Nights, and Capital Dance while releasing on labels like Armada Deep, Love & Other, and Perfect Havoc.
His sound has always leaned toward clean, euphoric melodies paired with club-driven precision, and his latest release Let’s Get Out with Kelli-Leigh on Kokidex follows that same instinct for feel-good momentum.
The collaboration traces back to a writing session in London years ago, when the track first began taking shape around a simple plucky synth pattern and a soaring topline from Kelli-Leigh. It sat unfinished for a while, only to be rediscovered and rebuilt with new perspective and production experience. The result captures that blend of polished modern house and nostalgic energy that defines Kokiri’s best work.
In this How It Was Made feature, Kokiri walks through the tools that shaped Let’s Get Out—from iZotope VocalSynth for its layered vocoders to Diva, RX950, ShaperBox, and Serum 2 for shaping warmth, movement, and tone. His workflow reveals how patience, iteration, and attention to detail can turn an archived idea into something that feels completely new again.
The Story
The story of this track goes back to 2019 when I was heading down to London for a couple of writing sessions. Me and Kelli had worked on stuff before and decided, whilst I was down we would get together and try and write something new. This idea initially started out with just the plucky synth chords that you hear in the finished track, and we structured the song around this. I remember we were trying to make it sound ethereal and otherworldly, which is why we ended up using vocoders on the vocals.
One of the early names for the song was “Engine Noises” because I decided to use a car revving sound effect in the song, but obviously that didn’t get kept as I realised it sounded ridiculous. This song was shelved for a while. I always loved the idea, but whenever I’d go back to it I just couldn’t seem to finish it. Fast forward to 2025, six years later, and I came across one of the original “Engine Noises” versions and realised just how good the song idea was. I spent about a week just tidying up what I’d already done and working on what is now the finished track.
I’ve found quite a lot of the time, especially recently, I’m going back and finishing loads of my old songs that at the time I just either couldn’t finish due to lack of ideas or experience. But the great thing is, I always loved this song and I’m really happy that we were able to finally get it released.
iZotope VocalSynth
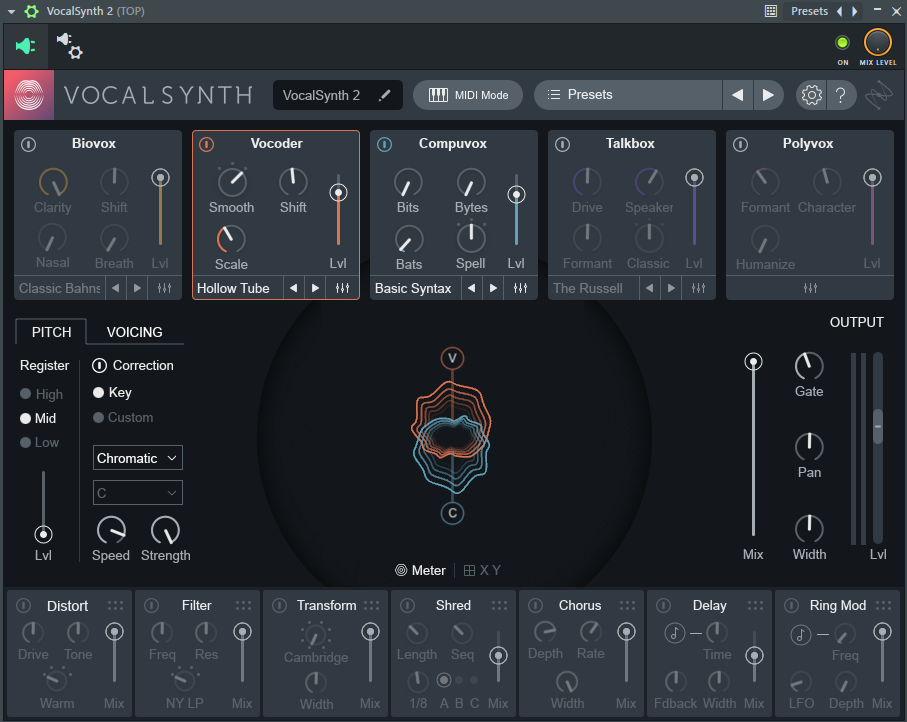
VocalSynth is an incredible plugin that allows you to create these crazy vocodered layers on your vocal tracks, but it’s not limited to just vocoders. There’s a whole range of different vocal processing types built in, each one creating distinctively different sounds and effects.
The way I used this on the track was layered to try and get the vocals sounding interesting. I loved Kelli’s vocal performance and thought the plucks we’d started with felt pretty euphoric, so I wanted to push that otherworldly vibe even further. I set up three different instances of VocalSynth on the vocal, each targeting a different frequency range. For the bass tones I wanted something that sounded a bit more like a talkbox, think G Funk style, so I dialled that in first. Then for the mids I used the Hollow Tube preset which became the main vocoded sound, and it fitted perfectly with what I was trying to achieve. The final vocoder was for the highs, and I remember making this one super wide to try and make the vocal sound massive across the stereo field.
For producers working in house or EDM music, this plugin is worth experimenting with beyond just vocals. I know that’s what it was created for, but you can get really interesting effects by feeding other things into it like basses or pads. Adding a preset on to say a synth chords and bringing the mix down will give them that extra bit of character. If you ever get a chance to try out this plugin, definitely spend time experimenting with different sound sources because it can do so much more than you’d expect.
U-He Diva
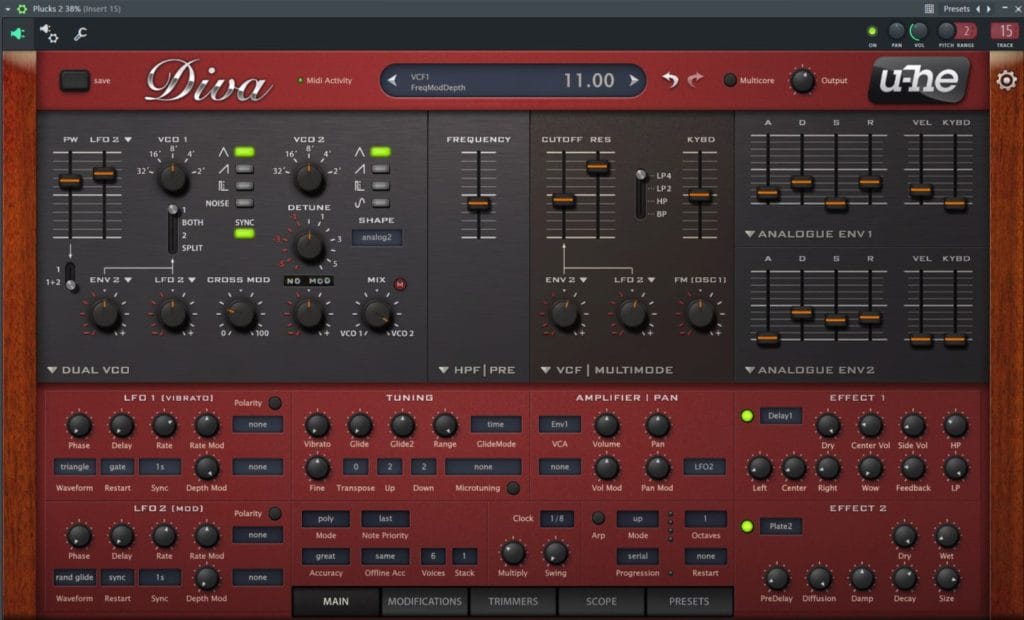
Diva has always been one of my go to plugins for any sort of pretty or plucky sound, or any sound to be fair. It’s just an all round powerhouse of a plugin that consistently delivers. The sound quality is incredible, and whilst it can be a bit CPU heavy, the results you get are absolutely worth it. It’s one of those plugins that just sounds expensive, if that makes sense.
I remember heading down to London for the writing session with Kelli, and I didn’t like to go in empty handed so I’d always try and come up with something on the train. I’m from Liverpool so I’d get at least two hours to mess about with ideas. I’d been sitting on these chords for a while, not really knowing what to do with them, so whilst on the train I just opened them up with Diva and started flicking through presets. After a little while I stumbled on one that I liked, and to commit to it I bounced it straight to audio. Diva is boss for creating any sort of sounds really and their built in effects are really polished too so you don’t really need to add anything outside of the plugin (except maybe an eq).
Inphonik RX950

This has become my go to filter plugin, and I think I bought it on sale on Plugin Boutique a while ago for something daft like six quid. The plugin itself is more than just a filter though, you can drive your signal into it and get some really nice harmonics and warmth. It’s modelled after The Akai S950. For the price it’s an absolute steal, and it sounds way more expensive than it actually is.
I used this as my main filter throughout the track, and one tip I like to do is bring the audio bandwidth knob down as I’m filtering because it degrades the audio the more it’s being filtered and makes for a really nice sounding effect. It gives you that lo fi character without needing a separate degradation plugin. I also used this on my kick drum, and this is where it really shone. I put it on my kick channel, brought up the input gain so I was peaking slightly, and then brought down the output gain to compensate. When you’re driving your sound into the input gain like this, it gives the kick this really nice warmth and punch that sits perfectly in the mix.
Don’t sleep on cheap plugins like this because they can genuinely compete with the expensive stuff. It’s one of those plugins that does a specific job incredibly well, and sometimes that’s all you need.
Cableguys Shaperbox
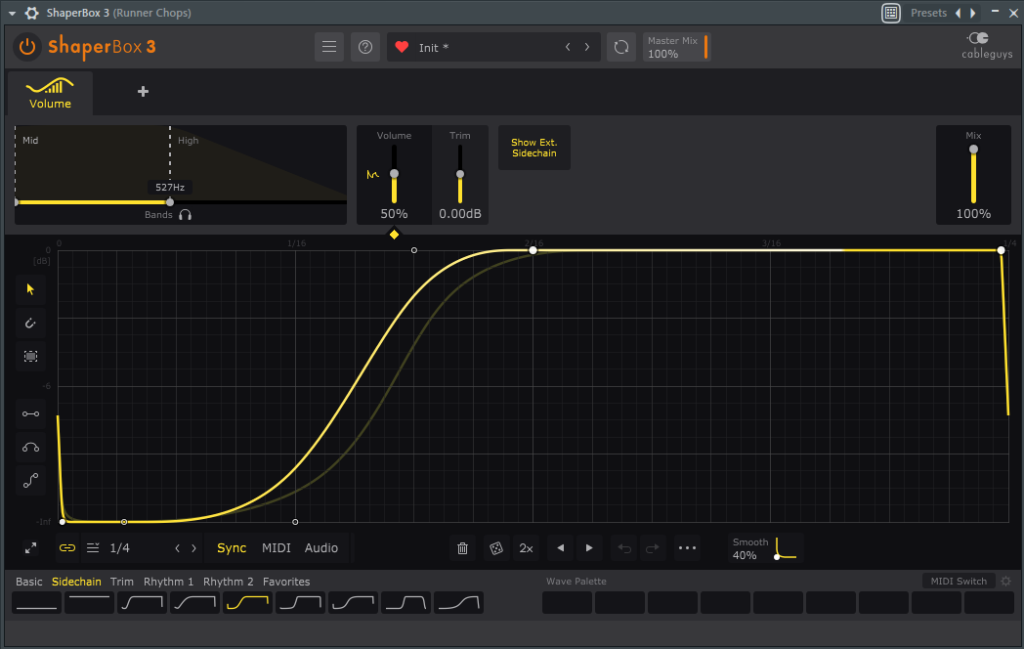
I say this every time to myself, but I just feel like I don’t utilise this plugin as much as I should. Some of the presets are absolutely crazy, and it’s fascinating what you can do with it. It’s essentially a multi effect tool that lets you shape different aspects of your sound over time, The interface is dead visual too, which makes it easier to see exactly what’s happening to your signal.
For this track I mainly used it for sidechain compression via the Volume Shaper module, and the reason I love this so much is because you can split your signal into three bands and affect each band differently. I do this loads with my drums. In this song, for example, I had some drums that had loads going on in the lows, and I didn’t want to get rid of them because I liked the sound. So I added a band and set it to 100% wet for the lows so that it’s a very over the top sidechain, which helped this part of the loop fit better with the rest of my drums. Then I used another band to affect the mids and highs but with less of the effect because I wanted these to be a bit more prominent in the mix.
Volume Shaper is one of those plugins that if you own it, you’ll find yourself just reaching for it constantly because of the ease of use. The multiband approach is boss because you can keep your hi hats and cymbals punching through whilst still getting that pumping sidechain effect on the lower frequencies. Try setting up a template with your preferred sidechain curve already made, because once you’ve got settings you like, you’ll use them on every track. It’s a very simple plugin conceptually, but it just does the job so easily and effectively that it’s become essential in my workflow.
Xfer Serum 2
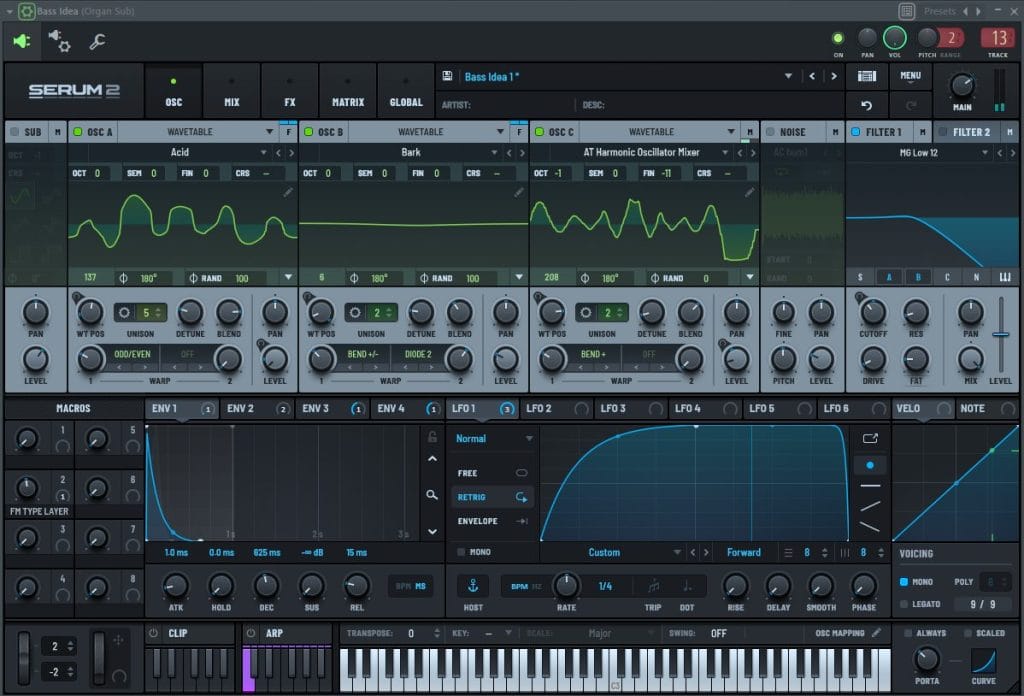
I remember when I first upgraded to Serum 2, I went about a week without opening it just because I was cautious that it would cause my laptop to seize up. Luckily, it didn’t, and luckily I got a new computer anyway, but honestly, it’s got to be one of the best wavetable synthesizers out there. The visual feedback is great, the modulation options seem endless, and the sounds you can create from it are insane.
For this track I used it to create a top layer for my already subby organ bass, and it just added the mids to the bass that it was missing. One thing I’ve always loved about Serum is how creative you can get with it, and how you can assign most things to most other things in terms of modulation. It’s a very visual plugin too, which is a big thing for me because I like to see what I’m doing. When you can see the waveform moving as you’re playing your sound, or if you can see exactly what the warp modes are doing to alter or skew your waveforms, it gives you a better understanding of how you’re shaping your sound. That visual feedback makes the learning curve so much easier.
Quick Fire Hot Takes on the Scene + Production
Hot Take #1: Social media makes it look like success happens overnight, but that “overnight” is usually years of hard work that nobody saw. I’ve been doing this since I was 13, and the reality is simple: if you’re passionate about it, you’ll find a way to make it work, even when the industry tells you no.
Hot Take #2: Commit to your sounds by bouncing them to audio when you’re happy with them. Indecision is a massive time waster, and forcing yourself to work with what you’ve got speeds up your workflow drastically.
Hot Take #3: Stop chasing perfection because you’ll waste so much time and energy trying to get everything sounding perfect. If you’ve got music you want to share with the world, just release it, chances are, there’ll be someone out there who loves what you’re doing.
Hot Take #4: Some days you’ll create the best music of your life, other days you’ll stare at a blank screen for hours and that’s completely fine. When I’m struggling, I tend to listen to music outside of the genre I make, do something else that’s not producing music, and most importantly, don’t beat yourself up about it. Just come back to it on another day.
Hot Take #5: AI assistants in plugins like iZotope are great for giving you a starting point, and i think we should embrace these tools as they get better. The problem starts when people use only AI to make music with no human input, but right now, AI to a certain degree can be used to genuinely help your workflow.
Hot Take #6: Listen to what other artists in your niche are doing and ask yourself one question: how am I going to stand out? Figure out what makes your music different, not just better.