How It Was Made: Meridian & Aleisha Lee – It Ain’t Easy (Mainstage + Future House)
South East London duo Meridian have quietly built a reputation for precision, depth, and infectious groove. Comprised of multi-instrumentalist Russell and prolific beatmaker Louis, the pair’s combined experience spans genres and decades, with credits and collaborations alongside names like DMX, The Fanatix, Bashy, and Zitah. Their music fuses the polish of veteran producers with the energy of artists still hungry to experiment.
Following the success of their “Turn Out” EP on The Disco Express, the duo return with another standout production on the label: “It Ain’t Easy“, the third single from the label’s upcoming 15-track 100th release – TDE100. It pairs the gorgeous vocals of Aleisha Lee with Meridian’s signature, multi-layered sound design, featuring lush synths, crisp percussion, and deep rhythmic movement. It’s a rich example of their craft: sophisticated yet immediate, rooted in dance tradition but reaching for something new.
On this installment of our How It Was Made series, we sat down with Meridian to see just how they pulled this track off. Take a listen to the track below, and read on to learn a few things from a truly special house duo.
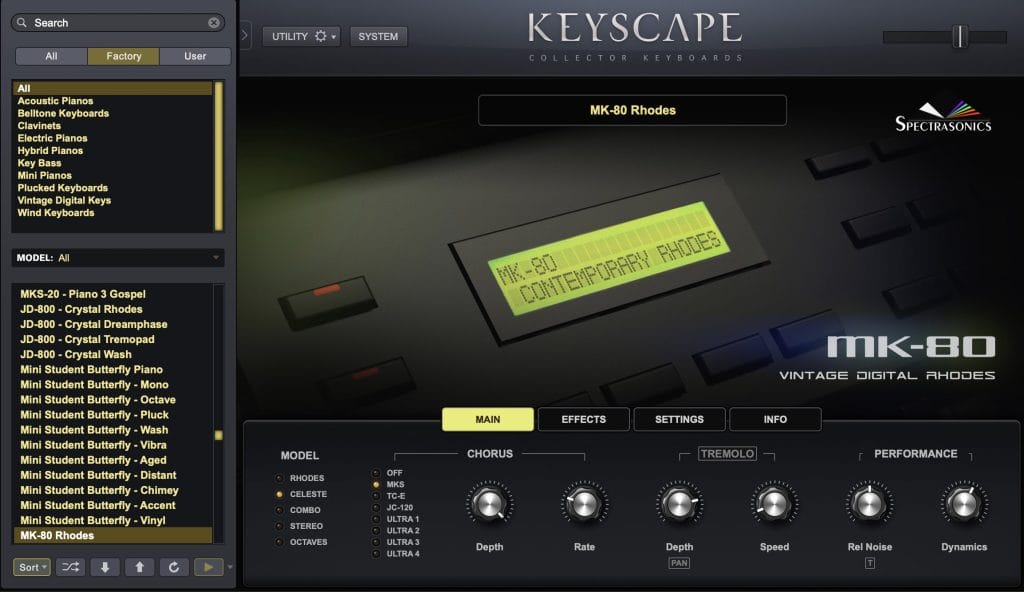
Keyscape
This plugin is a virtual instrument featuring the largest set of keyboards we’ve ever seen, ranging from acoustic pianos, vintage synths and exciting hybrid instruments. There’s so many different timbres to choose from that sound incredible as well as authentic, with detailed controls, built in effects and even an easy-to-use performance style section to fine tune the articulation of the sound.
For the pad we used the MK-80 Rhodes setting for the warmth and character, giving 00’s RnB vibes which was what the track needed to come to life. The best thing about this VST though is the preset depth and browser, it’s very easy to get going and simple to use. Once recorded, we’d changed the model option to celeste mode and used their built-in chorus… and that was it, only a bit more EQ to fit it in the mix, other than that nothing else was needed because it sounded so good! FYI – the stabbing piano is also from Keyscape, using the LA Custom Grand Piano setting
A tip from us would be to bypass the reverb and delay, it sounds good but it’s a quick way to clutter your mix and ruin the space in your track, especially if you’re looking to stack with other instruments in our opinion. Having the control with a separate reverb on a separate Aux channel means you can be more surgical and controlled with your effects and the space it occupies within the track

Decapitator
If there’s one thing we couldn’t live without its Soundtoys Decapitator. This plugin can produce subtle to extreme hardware-modelled saturation that sounds great and authentic to analogue distortion. There are five style sections to choose from, each style referencing famous analogue preamps and hardware consoles still used in the industry today. Most importantly with a flick of a button ‘punish mode’ really pushes the sound past ten on the drive dial, if you want to push the harmonics further
We use this plug-in in so many ways, from having it first in the chain with a tiny bit of drive, to having it last in ‘punish mode’ slightly mixed to add crazy harmonics. Great for pushing basslines, kicks and pretty much any synth. Generally, our rule of thumb is style ‘A’ for low end (Bass, Kicks) ‘E’ for top (Hi Hats, Snares, Percussion) and then ‘N’, ‘T’ ‘P’ for the mids (Guitar, Keys, vocals) but ultimately it depends on if it sounds good or not!
One thing we’ve found that’s vital with this plug in is the thump mode. Put this plugin on your kick push the drive to 3 in the style of ‘A’ and activate thump, you’ll be quarter of the way there to a great punching kick.
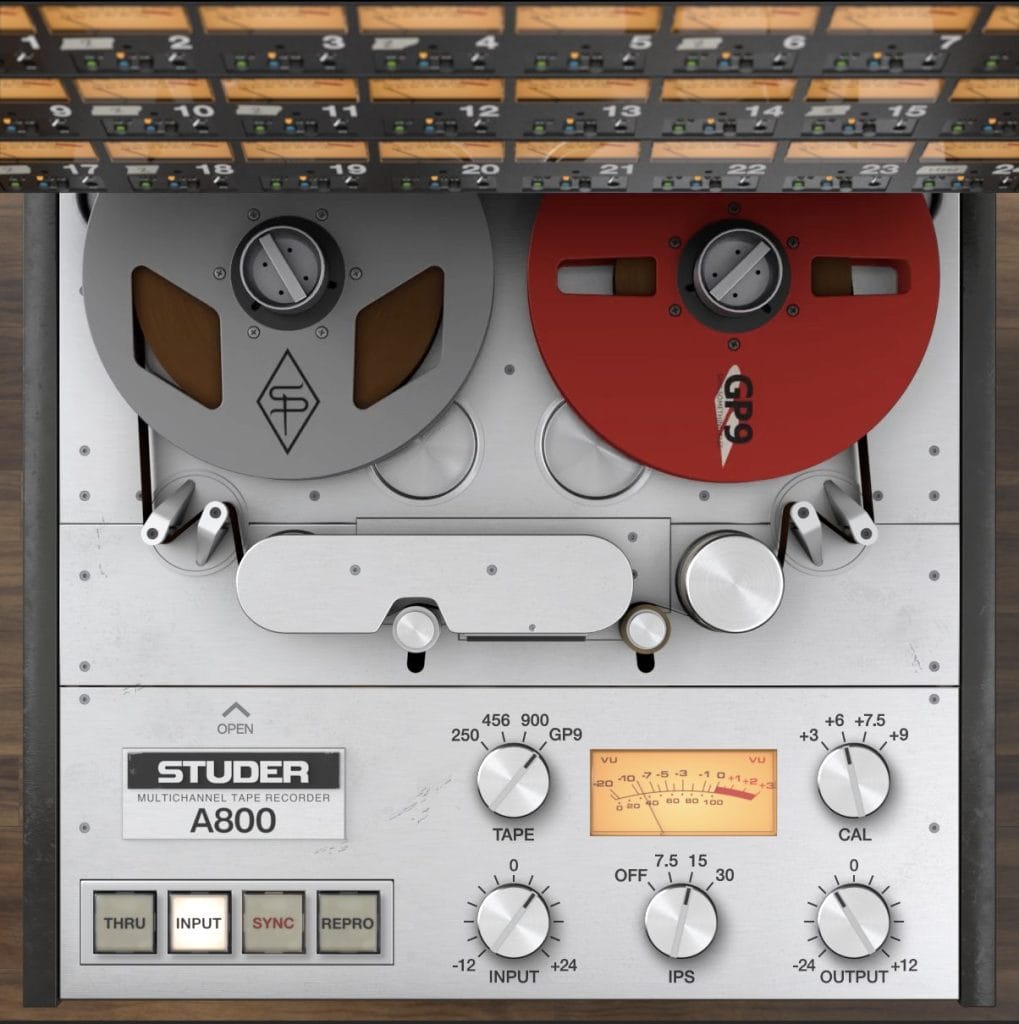
UADx Struder A800
This plugin helps our mix-busses out on every project. Once the individual elements of the mix are together, we split our instruments off into groups and this guy will be involved in one way or another. It emulates the famous Studer A800 a multitrack tape machine and its electronic signal paths – including ‘Input’, ‘Sync’ and ‘Repro’ adding the warmth, presence, and low-end punch.
We’ll use this as the last plug-in on the buses and not on individual tracks as the plugin cleverly takes care of glueing together all the different signals so effectively and cleanly, and with the plethora of presets it can get you in the ballpark quickly. The detail within the built in EQs are so powerful and an interesting section in the HF driver called the BIAS can create incredibly smooth hard compression, really bringing the music or drums right to the front of the mix without any artefacts.
A great tip to get a clean sound is to click on the ‘Studer’ logo, bring up the controls literally under the hood where you can turn off the noise which can get you great clarity when pushing the signal into the plugin, but be careful not to go into the red because you can make the sound more distorted than required for the genre. After all, this isn’t rock!
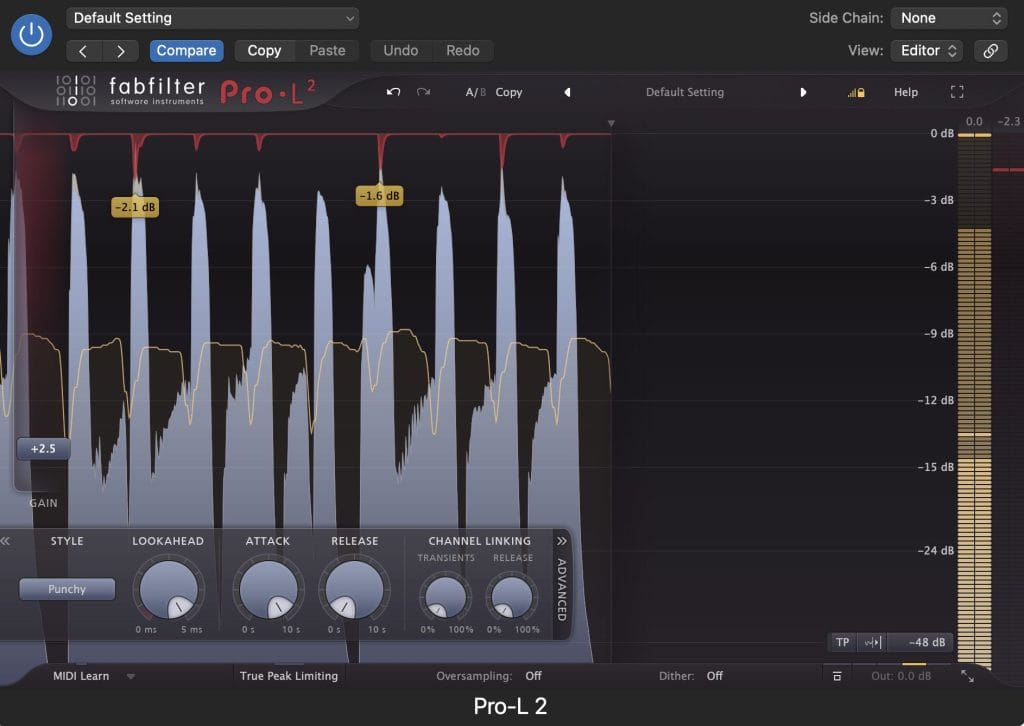
Fabfilter ProL2
No need to intro this but we’ll do so anyway! This plugin is THE limiter to use, as it’s not just a simple attack-release-threshold but a limiter that holds different colour and tone styles to help bring out at the best in the music
However, we use this in a nonconventional way for the final moment of the individual busses and turn it into a soft clipper, predominantly for the drum bus but sometimes for the vocals and music. The way you can do this is by activating the special 1:1 section hidden away by the output monitor, meaning the input and the output will always be the same level allowing you to push the threshold till soft clipping happens without affecting the loudness of the output. After that simply fully back off the attack, tighten the release to the max, push the threshold to about -3db and you’ll have soft clipping accumulating. And because of the extra section of style, you can introduce unique processing from what you’re driving into the limiter
We generally use the ‘Punchy’ style for low end and ‘Transparent’ for drums, after that it’s whatever sounds the best for what’s being fed in! A tip for this is to unlink the transients and the release in the advance section as the clipping will react more musically with the stereo signal going in.
Quick Fire House Tips:
- Make sure the drums groove with your music and the pocket is consistent/organic.
- Sidechaining the kick is important, but don’t use the kick. Create a separate click that’s muted for a fast-reacting sidechain that can be shaped more effectively.
- More space the better – finding moments to take elements out of the track can help improve the clarity of the mix and the aspect of tension then release.
- If you’re in a key not the best for the low-end don’t be afraid to tune your kick to the 5th or even 3rd of the root note.
- Kick tails are a thing of the past, get it in and get it out and leave all that lovely low end to mid space for a groovy or powerful bassline.
Stream “It Ain’t Easy” here.