How It Was Made: RUTH ROYALL – Bop
Bop finds Ruth Royall leaning into her producer role with the same intent and conviction that defined her debut album Queen. Released on her Royall Sound label, the track carries the soulful vocal work and rhythmic instincts she’s known for, wrapped in garage and drum and bass influences. It’s direct, infectious, and built for energy on the floor while still holding the detail and personality of a self-produced record.
The single arrives in the wake of Queen, a project that solidified Ruth’s standing as a vocalist, songwriter, and producer able to move between genres without losing her core sound. Her approach remains rooted in clarity, connection, and authenticity, whether performing at Glastonbury, ADE, or smaller, more intimate shows. With Bop, she delivers a concise, groove-focused track that reflects her versatility and willingness to keep evolving between releases.
In this feature, Ruth breaks down the production choices behind Bop, from shaping her lead vocal with Nectar Plus to controlling dynamics with R-Vox and keeping the space tight using short Valhalla reverbs. Her process blends technical precision with small creative touches that keep the vocal feeling alive, showing how even a streamlined chain can carry depth and personality when every decision is intentional.
For more information on Ruth Royall please visit: Facebook I Twitter I Instagram
Nectar Plus
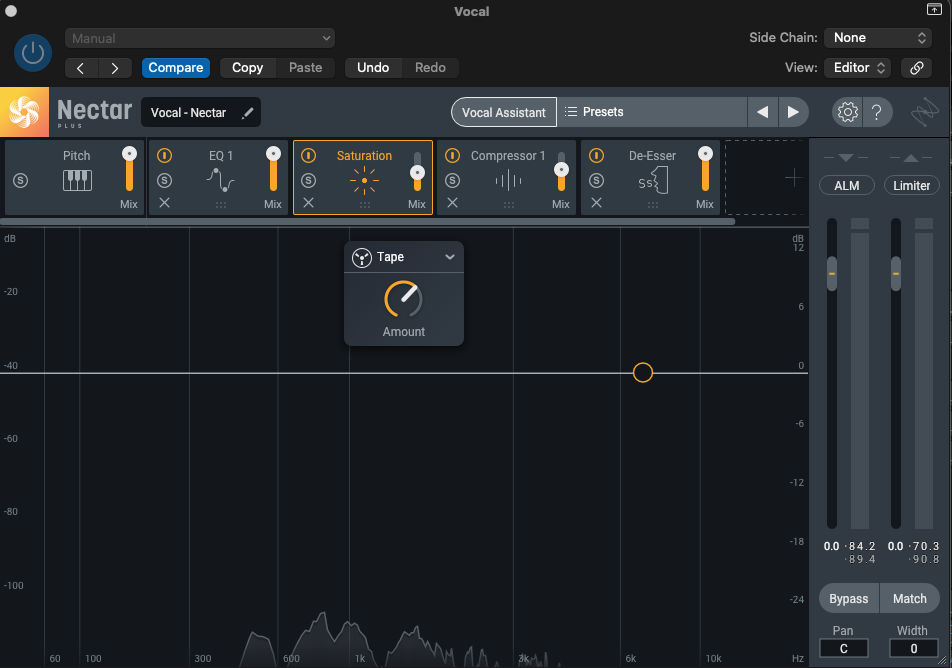
Nectar Plus is a complete vocal production suite in one plugin and it’s great for when I want polished vocals without stacking loads of inserts. It has EQ, compression, de-essing, saturation, delay, reverb, harmony and pitch correction all in a single chain. It also has an AI assistant feature which listens to my vocal and gives me a custom starting point. It’s really flexible so I’m able to get clarity or grit really easily depending on how I want to process the vocal.
For Bop I ran my lead vocals through Nectar right after some basic cleanup. I started by running the vocal through the Assistant to see what EQ it recommended as a base, then brightened the top end without making it harsh. I used the compressor in Opto mode to smooth the performance while keeping some natural dynamic lift, and the de-esser to tame some of the brighter consonants. I added a touch of tape saturation to give it that lo-fi garage feel. I didn’t want the vocal to feel too overproduced or perfect, so I leaned into a slightly grittier sound.
Nectar Plus saves me a huge amount of time. I like to treat it as a creative tool as well as a fixer because the saturation and delay can add vibe and movement, especially in breakdowns or just before drops. I often automate small changes in saturation or reverb size to make a vocal feel like it’s evolving through the track. I’ve also learned to hold back on compression so the vocal feels human.
Waves R-Vox
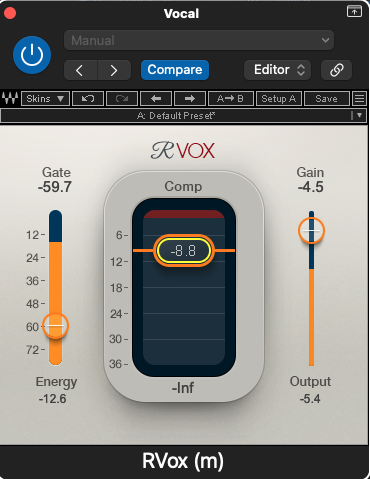
R-Vox, is one of those classic compressors that is on pretty much every vocal chain I build. It’s really simple to use, with just three controls – Gate, Compression, and Gain. It’s clean, and is easy to dial in, giving vocals presence without a lot of tweaking.
For Bop I ran all my vocals through R-Vox as one of the very first stages in my chain. I set the compression around 4 to 5 dB of gain reduction so it was controlling peaks without flattening the life out of the performance. The Gate is so intuitive on this plugin. I pulled it back enough to remove any unwanted noise between phrases without cutting off the breath. After R-Vox, I fed the signal into Nectar Plus for more detailed shaping, but R-Vox did the heavy lifting in keeping the vocal solid and consistent.
R-Vox is great for keeping the vocal right at the front of the mix without sounding over-compressed. It works well even if the track is busy. I like stacking it before a more character-driven compressor, so R-Vox handles the control and the second compressor adds colour.
Valhalla Reverb
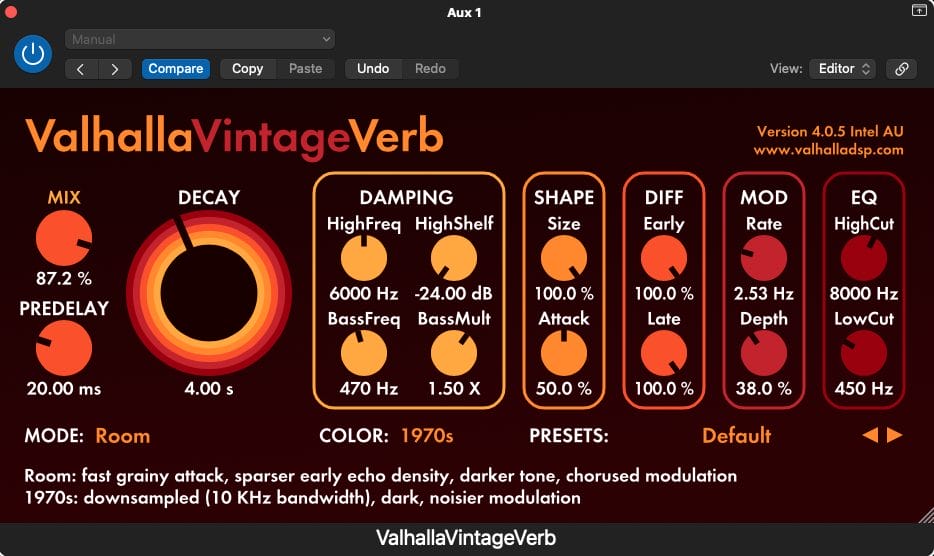
Everyone knows Valhalla because it’s so good. It’s simple to use, sounds great, and covers everything from huge cinematic spaces to small, intimate rooms. It’s got loads of presets so it’s easy to get creative and shape exactly the kind of space you’re after.
For Bop I used two different reverbs on the lead vocal, a Room reverb and a Plate. I kept both tails quite short because I wanted a lo-fi, not overly produced feel. The vocal is almost delivered like a rap, and I found a shorter reverb worked better for keeping the words upfront.
Tips for making drum & bass
In garage or drum and bass, shorter reverbs can make a difference in keeping the vocal punchy over busy instrumentals. I’ve found that blending a Room and Plate can give you both warmth and presence without adding too much tail. Automating the reverb level in breakdowns can also be a nice trick to make the vocal open up before snapping back to a drier sound in the drops.
Tip #1
Start things off with a good compressor to keep the vocal sitting right in the pocket. In garage, a stable vocal lets the drums breaks move around it.
Tip #2
Nectar isn’t just for cleanup, you can automate saturation, reverb size, and delay sends to match the energy shifts in the track. That movement keeps the vocal bouncing and it’s easy because it’s all in one place.
Tip #3
Go for short reverbs. A blend of room and plate keeps the words clear over a busy beat while still adding character.
Tip #4
Tape saturation or anything with a vintage feel gives the vocal that garage edge. It’s a great way to stop things from feeling overly polished.
Tip #5
Leave the breaths in! They keep the vocal human and actually end up giving the track more movement and bounce.