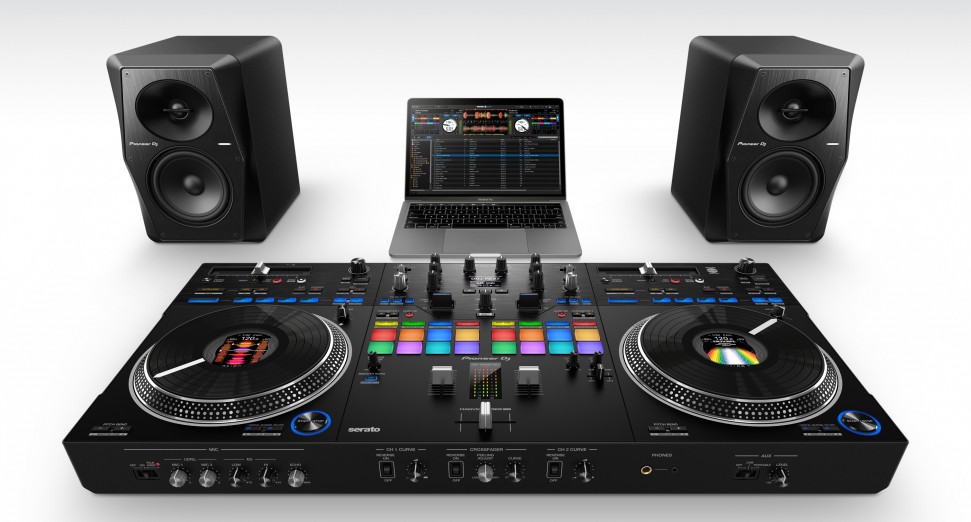
How It Was Made: Victor Tomasi – Deep Down Inside (House)
Paris-based producer, DJ, and live performer Victor Tomasi returns with Deep Down Inside, a three-track EP landing March 13, 2026 via SDGM. After spending the past few years refining his approach through releases on labels like Housewax and SDGM, Tomasi has been shaping a style that leans heavily on groove, live instrumentation, and a direct relationship with the dancefloor. His background as a producer and multi-instrumentalist continues to guide that process, especially through the use of hand-played electric bass and a stripped-down production mindset.
The EP centers around a simple idea that sits at the heart of classic house music: a strong rhythm section and a bassline that carries the track forward.
Drawing inspiration from the traditions of Chicago and Detroit house, Deep Down Inside keeps arrangements clear and functional while still leaving space for character. The title track opens with warm percussion and a bassline that drives the groove, “Come On” pushes the energy slightly further with a more direct club focus, and “Pom Pom Pom” closes the EP with a vocal-driven structure built for collective moments on the dancefloor.
For this How It Was Made feature, Tomasi walks through the tools that shaped the EP’s sound, from the legendary Korg M1 VST that helped deliver classic house textures, to processing chains that shaped the bass and drums into something tight and club-ready. The breakdown highlights how a relatively minimal set of tools, when used with intention, can deliver a record built around groove, movement, and live energy.
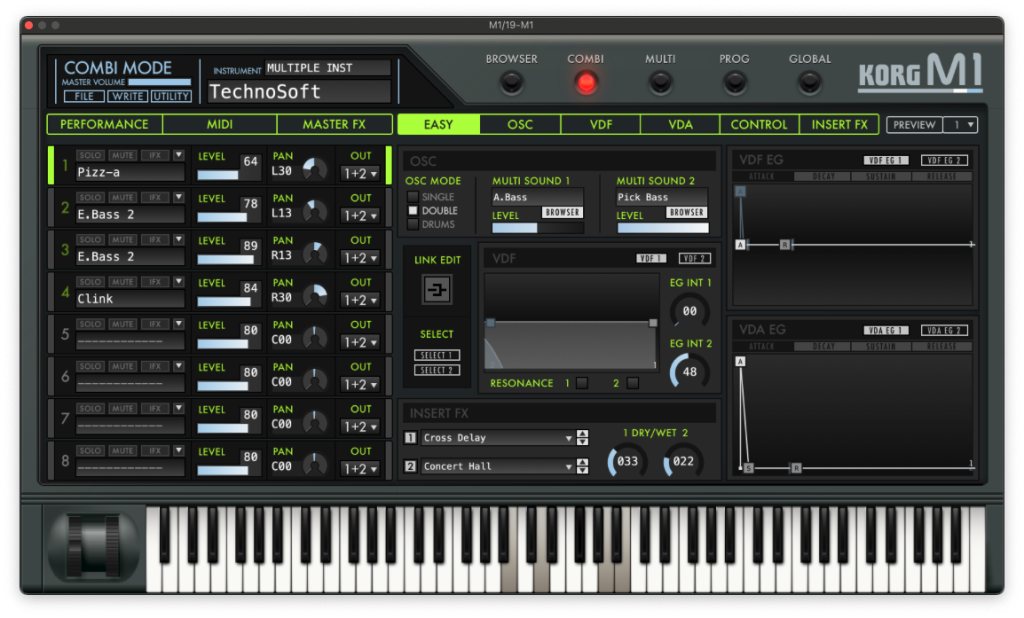
I bought this synth during Black Friday this year. After spending several years making house music using only Ableton Live’s stock library and samples, I finally discovered why this synth is so legendary for achieving that classic old-school house sound. It is a very powerful tool.
I layered a few stabs using the “Techno Soft” and “Tablette” presets. One of the controversial things about this VST is that it’s not the most versatile synth out there, but almost every preset already sounds good straight away. I mostly used it as a sound source and then shaped things with EQ and a bit of saturation afterwards. I also used the VST to play that classic cheap house sax sound, which fits perfectly with the old-school house vibe I was going for.
For me, some of these presets have very specific uses. They instantly bring that strong 90s house flavour to a track. A few of them work great on their own, but I often like to layer them with other synths to make the sound feel a bit more modern and less kitsch. It’s a great tool if you want to capture that classic house character without overthinking the sound design.

CLA Bass is a rack designed to make your bass guitar sound bigger and more polished. It combines several tools in one plugin, including EQ, compression, a sub-harmonic enhancer, chorus, and other processing. The idea is to quickly shape and enhance a bass signal without building a full chain from scratch. I use it almost every time I plug my Jazz Bass into Ableton.
Since the sound of my bass changes depending on the strings and how I play, I usually start from scratch with this VST and shape the tone step by step. It’s quite a heavy processing chain that can drastically change the sound, so it’s also easy to overdo it if you’re not careful. On this track, the plugin is really what makes my bass guitar sound like a house bass. I pushed the sub section quite a bit and added a subtle distortion, which the chorus then helps emphasize. That combination gives the bass a thicker and more energetic character.
This plugin can really make your bass guitar sound huge, but it will also make your mistakes more obvious. It’s important to clean up your bass recording before setting up the VST. I also like to manually shape the envelopes to keep the bass tight and avoid too much sustain, which works better for house grooves. Once the bass is controlled, you can push the sub section of the plugin and it will sound big and powerful in the mix.
Ableton Drum Buss
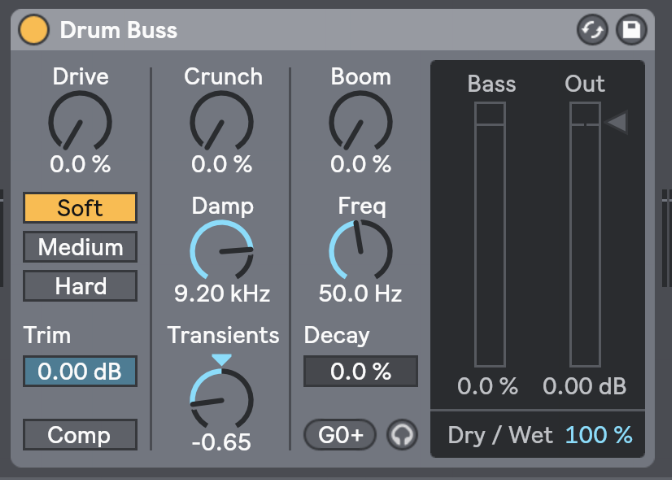
Drum Buss is a built-in Ableton Live plugin designed to add punch, weight, and character to drums. It combines compression, transient shaping, saturation, and a low-end boost in one simple device. I use Ableton Live 10, so it’s not the newest tool around, but it’s very efficient. It’s probably not the most purist approach, but I like tools that get the job done quickly.
On this track, I used Drum Buss only on the kick. I did not even touch the drive to bring some saturation but used the Transient control to make the attack slightly stronger. I also pushed the Boom section a little to reinforce the low end of the kick. It’s a quick way to make the kick sound bigger and more solid in the mix without adding a long chain of plugins.
For house music, this plugin is a simple way to give your kick more presence. The trick is not to push it too far, because it can quickly become too heavy. I like to keep the settings quite subtle and let the groove do the rest.

bx_clipper is a clipping plugin designed to control peaks and increase perceived loudness. Instead of compressing the signal, it simply trims the highest transients, which helps reduce sharp peaks and create more headroom in the mix. It’s a very practical tool for keeping drums under control while maintaining their punch. Used subtly, it can also make a drum bus feel tighter and more cohesive.
On this track, I used bx_clipper on my drum group to tame some of the strongest transients. I set it quite gently, just shaving off a bit of the peaks from the hats and claps so they sit better together. The goal wasn’t to add distortion but simply to clip the signal slightly and gain a bit of headroom. It also makes the drums feel a bit more compact and controlled in the mix. That way I can push the drum level a little higher without the transients jumping out too much.
For house producers, clipping can be a very useful way to manage punchy drums. The trick is to use it lightly and just catch the highest peaks rather than flattening the sound. I like to place it on the drum bus so it reacts to the groove as a whole. It keeps the drums tight and helps leave more space for the rest of the mix, especially with live recorded percussion.
Quick Fire Tips For Making Music
#1
The beat is the key to house music. If the drums groove properly, half of the track is already done.
#2
Bass is one of the foundations of house. Sometimes a track can work with just drums and bass—if the groove is right, that’s already enough to make people move.
#3
Don’t overproduce. House music works best when the arrangement stays simple, clear, and focused on the groove.
#4
Test your tracks on a dancefloor whenever you can. House music is made to make people dance, so the real feedback always comes from the crowd.